DANCE STUDIO MAKEOVER - PART 2, PLANNING
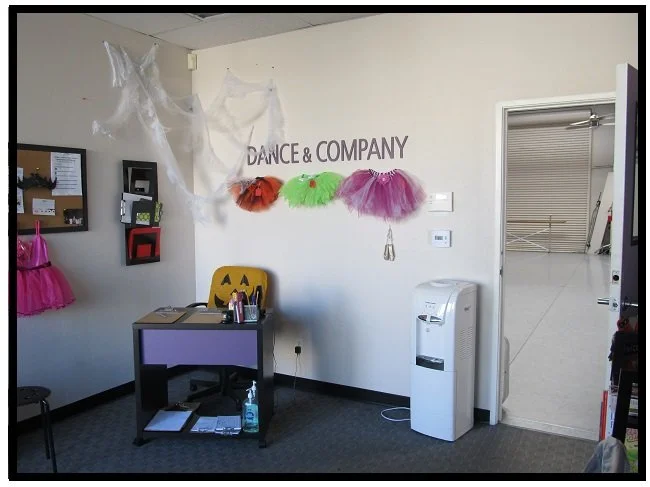
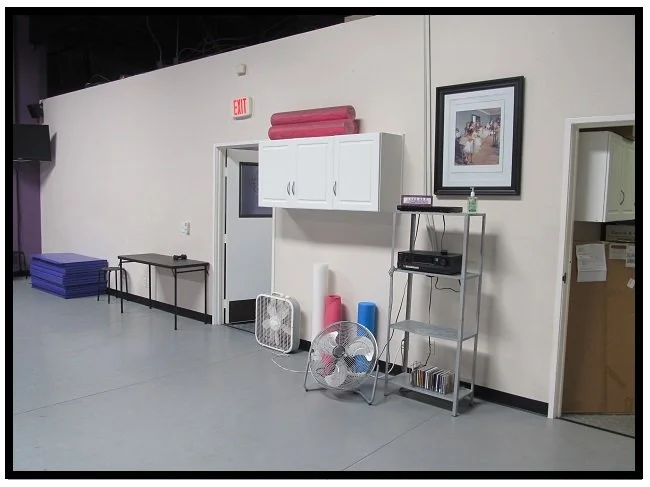
With your home projects, don’t you feel like getting to the end result is half the fun? I hope so. That certainly was true with my business design project at the dance studio. There’s something so satisfying about taking a project from start to finish, then looking back at every decision and action and remembering how you adapted to manage all the curve balls that are part of EVERY project—must be a law of nature or something! Hmmm, when I met with Lisa and Katie (the studio owners) to start planning the studio project it seems like just yesterday (cue soft harp strumming)… Following in this blog are all the before pics so that you can see our starting point.
SPACE WE PUT UP WITH VS. SPACE WE WANT
During that first meeting we discussed all the questions covered in the first blog of this series (likes, dislikes, pain points, functionality and user needs, budget and desired atmosphere. Following is a list of main needs we identified and some before photos:
More storage for studio items as well as for student items during class time
An effective way to display dance merchandise for sale
Better flow to overall space—make it feel less crowded
Privacy in the staff office
A space for the studio receptionist to be more prominent and helpful
Extra space for students to change clothes
A general facelift to make the studio feel fresh, energized and inviting
NOODLE & DOODLE
After taking plentiful notes from our meeting, I took plentiful time to noodle ideas and doodle sketches. I knew what Lisa and Katie’s priorities were and their budget parameters, so my major task was to experiment. So much fun! However, you can drive yourself crazy if you try to solve for everything at once, so I recommend focusing on ONLY top priorities first.
One aspect you may struggle with on your projects is vision. It can be hard to look past what exists to imagine what could exist. This comes with experience. Until you learn to master the vision thing, do your best to turn back any stress you may be feeling to come up with a solution. And take your time. When you feel like your ideas aren’t flowing, take a break. Occupy your mind with something completely different and revisit the design challenge later. Flow can’t be forced!
EVERYONE LOVES OPTIONS
When you’re still in the planning states—whether it’s someone else’s project and even when it’s your own—don’t focus on finding just one answer. Bringing forward a few good solutions and thinking them through in detail will help you feel satisfied that you’ve landed on the right one.
Here are some of the ideas I presented to Lisa and Katie:
Purchasing benches with cubbies and baskets for more storage and seating
Having built-in cabinets made that could also be used for display as well as extra seating
Circular shower rod with curtain to create an extra changing space
Moving receptionist desk forward in lobby to create better flow and better first impression
Built in desks to help create more and better work space and flow in the office
Rearranging existing cabinets and furniture to help with traffic flow in space
What additional ideas might you have thought of? Which of the ideas on the list do you find most appealing? In the next blog I’ll tell you which ideas we adopted and how we tackled the work—plus some of the “ughs” we ran into along the way.
Now what will you do next to love where you live?


